

No cocktail toolkit is complete without a bar spoon — essential for classics like the Manhattan and the Martini. Master the art of stirring, and you can recreate that true bar-quality taste right at home. This guide breaks down three core techniques: stirring, layering, and floating. Learn to use them properly, and you’ll take your cocktails to the next level.
Build vs. Stir
There are three basic ways to make a cocktail: shaking, stirring, and building. This time, we’re focusing on stirring.
If you’ve ever looked up a cocktail recipe in a book or online, you’ve probably noticed some call for “stirring” while others call for “building.” Both involve combining ingredients, so you might wonder why bother with two different terms at all. As it turns out, there’s a real difference between the two — and that’s exactly what we’ll break down here.
Stirring
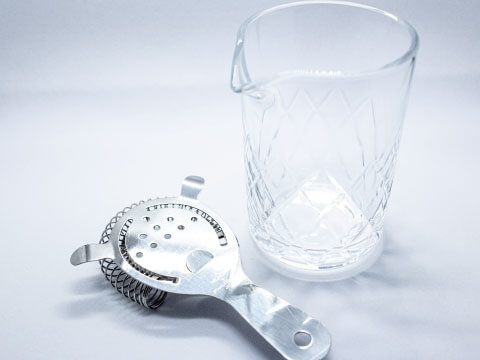
Photo | A mixing glass and strainer
What Is Stirring ?
“Stirring” simply means mixing ingredients together. Its two main goals are creating a uniform flavor and chilling the drink.
If you’ve ever spent time at a bar, you’ve probably noticed that spirits are typically stored at room temperature on the shelf. Stirring is how bartenders bring the temperature down.
The Purpose of Stirring
As mentioned, stirring serves two main purposes: blending ingredients into a consistent flavor, and chilling spirits that start out at room temperature.
It also plays another role. Short cocktails can’t simply be poured together directly in the serving glass the way long drinks can — instead, the ingredients go into a larger mixing glass, get combined there, and are then strained into the smaller glass.
How to Stir, and a Few Classic Examples
Fill the mixing glass with ice that has no sharp edges (if using standard ice cubes, stir them alone first and discard the water that collects). Add your ingredients, stir 10 to 15 times, then fit the strainer over the glass, hold it in place, and pour into the serving glass.
Some of the most iconic cocktails in the world — the Martini and the Manhattan among them — are short cocktails made this way. This stirring technique, using a mixing glass, is the method behind these small-glass classics served in a cocktail glass.
Building
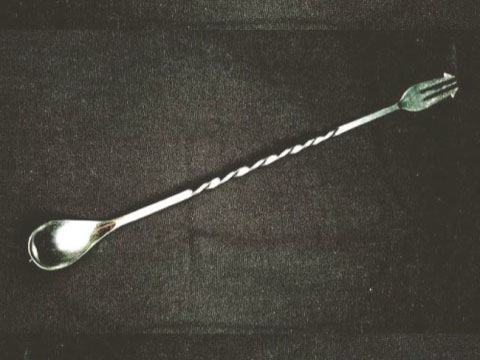
Photo | A bar spoon
What Is Building ?
Building means adding ingredients and ice directly into the serving glass.
The goal of building is to assemble a cocktail simply and quickly, keeping the layers of ingredients distinct rather than fully blending their flavors together.
Because the ingredients aren’t fully mixed, this technique can create a drink that tastes different from the first sip to the last. A light stir can also be used to soften the loss of carbonation without over-mixing.
How to Build, and a Few Classic Examples
Building calls for glasses meant for assembling drinks directly, like a Collins glass or tumbler. The basic order is: ice, then ingredients, then a gentle mix. Any fruit added for flavor goes in before the ice; garnishes go in last.
Classic examples include the Gin & Tonic and the Whiskey Highball — drinks assembled right in the glass, and mostly the domain of long cocktails.
Summing Up the Difference

Hopefully this has helped clear up the difference between stirring and building. Here’s the short version:
Stir — Use this technique to blend ingredients into a uniform flavor while chilling the drink, and for short cocktails served in glasses too small to mix ingredients directly.
Build — Use this technique to combine easy-to-mix ingredients right in the serving glass, with just a light stir. This keeps subtle layers intact for a flavor that shifts as you drink, and helps preserve carbonation when soda or other fizzy ingredients are involved.
How to Use a Bar Spoon
How to Stir

- Step 1 — Press the base of the glass down with your left hand (this keeps your body heat from warming the drink), and hold the bar spoon in your right hand. (Reverse this if you’re left-handed.)
- Step 2 — As shown in the video, tuck the spoon between your middle and ring fingers.
- Step 3 — Your thumb and index finger also rest against the spoon, but their only job is to keep it from slipping — hold them loosely.
- Step 4 — Guide the back of the spoon along the inside edge of the glass, down toward the bottom.
- Step 5 — Push the spoon away from you counterclockwise using your ring finger, then pull it back toward you clockwise using your middle finger. Throughout this motion, the back of the spoon should always stay facing the outer wall of the glass.
Repeat this motion continuously. It’s tricky at first, so practice with a large glass filled with just ice until you get the hang of it. It’s well worth mastering once it clicks — it’ll make stirring a breeze.
Mixing Carbonated Ingredients

When working with carbonated ingredients, stir slowly and carefully. Mixing too fast or with too many rotations doesn’t just risk the drink overflowing — it knocks the fizz right out of it.
Slide your bar spoon or muddler down along the inside of the glass to the bottom. Keeping it in contact with the glass, turn it slowly through one to one-and-a-half rotations, then use the spoon’s bowl to gently lift the ice and lower it back down.
For ingredients that don’t blend easily, stir the non-carbonated components together first, then add the carbonated ingredient and give it one more light stir.
How to Sink and Float Ingredients
Plenty of cocktails come in two distinct colors. Some even build up several layers — the famous Pousse Café, shown in the photo below, is a great example.
These layered cocktails are made by pouring the ingredients in order from heaviest to lightest. You can’t achieve this by simply pouring straight into the glass; it takes a slow, careful pour to keep the layers from mixing. That’s where the bar spoon comes in.

- Step 1 — Measure out the ingredient you want to sink into a jigger or small glass beforehand. (Some pour straight from the bottle, but bottles are heavy and it’s easy to pour too much, so beginners should avoid this.)
- Step 2 — Point the tip of the bar spoon downward, with the back of the spoon facing up.
- Step 3 — Rest that downward-pointing tip against the upper inside wall of the glass.
- Step 4 — Slowly pour the ingredient you’re sinking over the back of the spoon.
This lets the heavier ingredient settle at the bottom while the lighter one floats above, creating a layered cocktail. Classic examples include the Tequila Sunrise and American Lemonade.
Tools for Floating & Sinking Ingredients
When floating (or sinking) an ingredient, you can either use the back of the bar spoon, or use a bar spoon with a flat metal disc on the opposite end, letting the liquid trickle slowly down the twisted handle onto the disc. The disc method is generally the easier of the two.
Video: Using the Back of a Bar Spoon
- Video credit | @masatakeshinano Channel Home
Video: Using a Bar Spoon’s Metal Disc
- Video credit | @soheiman Channel Home

